The Breakdown, Episode 01: My Go-To One-Light Setup
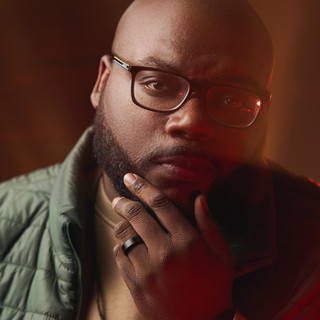
A simple lighting setup does not have to produce a simple image. For this first edition of The Breakdown, I’m sharing the one-light setup I keep in my back pocket when a production needs to move quickly without losing the polish I want from fashion imagery.
The Creative Intention
Because I primarily photograph fashion, I needed a dependable setup that could feel refined in almost any room. A large umbrella is lighter, faster to build, and easier to travel with than a more elaborate lighting package. More importantly, it gives me a proven starting point when time and space are limited.
Sometimes I don’t have time to build an extravagant setup. This is a proven recipe, so I always keep it in my back pocket.
The Lighting Setup

The key is not simply placing an umbrella in front of the model. I position it to either her left or right, with the edge of the modifier roughly lining up with her body. The face of the umbrella is not aimed directly at her; she is lit primarily by the softer edge of its beam.
When ceiling height allows, I raise the umbrella approximately two to three feet above the model. That height gives the light a natural downward direction, while feathering keeps the shadows soft and the falloff smooth. It also helps avoid the deep eye sockets—or “raccoon eyes”—that can happen when an overhead source is pointed too directly at the face.
Why Feather the Light?
The center of a modifier produces its most direct and intense light. By turning the umbrella slightly past the model, I use the edge of the beam instead. The transition from highlight to shadow becomes gentler, skin feels smoother, and the light wraps without flattening the face. It is a small positioning adjustment that makes the setup feel considerably more controlled.
The Reflector Is Doing Two Jobs
A reflector placed below the model returns a measured amount of light beneath the face and chin. It opens the shadows without removing their shape, which is important when the wardrobe is predominantly black.
It also creates a lower catchlight in the eyes. Catchlights may be a small detail, but they give the eyes clarity and presence—especially in fashion and beauty portraits, where the viewer’s connection to the subject matters.
Catchlights are a small detail, but they can immediately elevate a fashion or beauty portrait.
Camera Choices
The images were photographed at 50mm, f/6.3, 1/160 second, and ISO 100. The 50mm focal length worked comfortably within the available space while preserving a natural portrait perspective. It also allowed me to move between closer beauty frames and wider fashion compositions without the scene feeling distorted.
For studio strobe work, f/6.3 is one of my dependable starting points. It gives me enough depth of field to keep the model sharp through subtle movement, and many lenses perform especially well around this range. The shutter speed stays safely within flash synchronization, while ISO 100 provides a clean base file.
The Grade: Giving the White Background a Point of View

A neutral, white-balanced image was technically correct, but it did not say much on its own. Cooling the background gave the frame atmosphere, depth, and a clearer visual identity. The warm brown of the coat and Zenovia’s skin became the counterpoint to that icy environment.
The goal was not to apply color for novelty. It was to make the image feel more intentional and give someone a reason to stop. Color grading became part of the storytelling rather than a finishing effect.
A technically correct image isn’t always a compelling image. The color grade gave this one the depth and atmosphere it needed.
Looking Back
If I revisited this production today, I would explore additional textural elements—perhaps a prop or a carefully controlled secondary light—to create another layer within the frame. Still, the restraint is part of why the original setup works. It proves that one well-placed source, a reflector, and deliberate color can carry a complete fashion story.
The Results


Credits
Photographer: Anthony Ferrell — @iamaferrell
Model: Zenovia Hawkins – @zenoviahawkins
Continue the Conversation
What is the one lighting setup you trust when time is limited? Share your go-to approach in the comments—and save this breakdown for the next time you need a simple setup with a polished result.

Comments